WooCommerce ships a product page that works and looks like every other WooCommerce product page. Changing it traditionally means a child theme, template overrides in woocommerce/single-product/, and a pile of hooks you have to remember. None of that is visual. A Bricks WooCommerce product page, built from native elements, is.
This guide builds a custom single-product template inside Bricks Builder — gallery, price, swatches, stock, quantity, add to cart and badges — using the WooCommerce Elements module, so every part is a Bricks element with normal style controls.
What Bricks gives you natively, and what it does not
Bricks has solid WooCommerce support out of the box: you can create a single-product template, and it provides core product elements. Where people hit the wall is the details that make a store feel finished — variation swatches instead of dropdowns, a gallery with variation-aware image switching, stock messaging with a low-stock threshold, “buy now” that skips the cart, automatic badges, and a free-shipping progress bar.
Those are the gaps the WooCommerce Elements module fills, with 18 product elements on the single-product side alone.
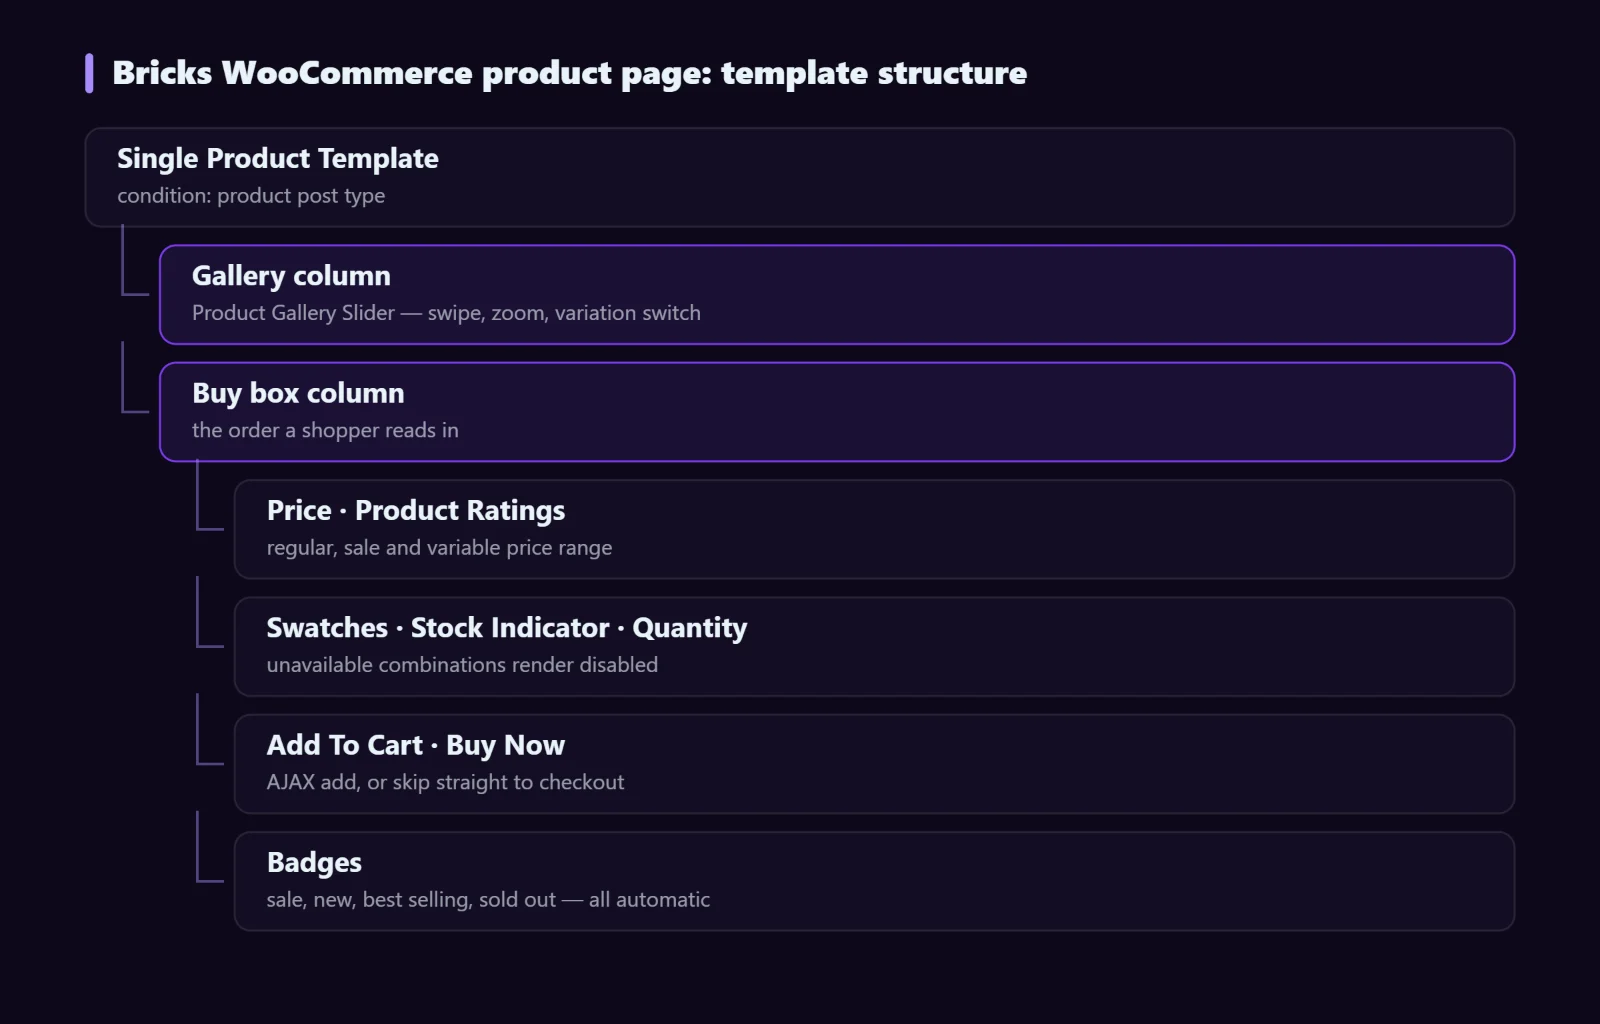
What a Bricks WooCommerce product page needs
Step-by-step: building the Bricks WooCommerce product page
1. Create the template and set its conditions
In Bricks → Templates, create a new template of type Single. In the template settings, set the condition to the product post type so it takes over every product page. While editing, use the preview setting to point at a real variable product — previewing with a simple product hides every variation element and you will think they are broken.
2. Enable the WooCommerce Elements module
Switch on WooCommerce Elements in the Djia Bricks modules panel. If you also want colour and image swatches, enable Swatches at the same time. Modules you leave off register nothing, so a non-store site never loads any of this.
3. Build the gallery side
Drop in Product Gallery Slider. It handles thumbnails, swipe on touch devices, zoom, and switching the main image when a variation is selected — the last one is what makes a colour-variant store feel right. If you only ever show one image, Product Image is the lighter choice.
4. Build the buy box
In the right column, stack the elements in the order a shopper reads them:
- Price — handles regular, sale and the price range that variable products show before a variation is picked.
- Product Ratings — stars plus review count, pulled from WooCommerce’s average rating.
- Variation Attributes — the selectors. Swap these for Swatches to show colour circles or images instead of dropdowns; unavailable combinations render as disabled rather than silently failing.
- Stock Indicator — set a low-stock threshold and a custom message. “Only 3 left” converts; “In stock” does not.
- Quantity — the plus/minus input, with min and max. Dropdown Quantity is the alternative when you sell in fixed amounts.
- Add To Cart — AJAX, so the page does not reload and the cart counter updates in place.
- Buy Now Button — adds the item and sends the shopper straight to checkout. Worth testing against the standard flow; it helps on single-item stores and hurts on stores where people build a basket.
5. Add badges
Four badge elements exist and all of them are automatic, which is the point — nobody has to remember to tag a product:
| Badge | Shows when |
|---|---|
| Sales Badge | Product is on sale — percentage or fixed discount |
| New Badge | Published within a timeframe you configure |
| Best Selling Badge | Product is among the top sellers by order count |
| Sold Out Badge | Stock reaches zero — as an overlay or a badge |
6. Test with the awkward products
Before you call it done, preview the template against: a simple product, a variable product with many attributes, an out-of-stock product, a product on sale, and one with no gallery images. Most broken product templates are broken only for one of those five.
Adding wishlist and compare
Two separate modules extend the buy box. Compare adds a comparison table where shoppers put products side by side on the attributes you choose. The wishlist side adds Favorites Button, Favorites Query Loop and an In Favorites condition — and it works for any post type, not only products, so you can use it for a saved-listings feature on a directory site. Favorites persist in browser storage for guests and in user meta once someone logs in.
Showing different content to different shoppers
The Conditions module is what turns a static template into one that reacts. A few that earn their place on a product page:
- Show a “you already own this” note when the customer has previously purchased the product, instead of the add-to-cart button.
- Show a wholesale price block only to users with a specific role.
- Show a cross-sell banner when a specific item is already in the cart.
- Hide the quantity picker when stock is one.
Troubleshooting
Variation elements do not appear
The template is previewing a simple product. Change the preview target to a variable product.
Add to cart works but the counter does not update
The Cart Counter element is missing from the header, or a script optimiser is deferring the cart fragments request. Exclude the cart script from deferral and retest.
Prices are stale after a sale starts
A full-page cache is serving the old HTML. Exclude cart, checkout and account pages from page caching entirely, and make sure your cache clears on product save.
FAQ
Does this replace WooCommerce templates?
It replaces the layout, not the engine. Cart handling, pricing, tax, stock and orders are all still WooCommerce; you are only rebuilding what the shopper sees.
Will my existing hooks still fire?
Hooks tied to WooCommerce actions keep working. If a plugin injects content through a template hook that your custom layout no longer renders, that content disappears — which is usually what you wanted, but check for anything important such as a GDPR notice.
Can I use a different template for some products?
Yes. Create a second Single template and give it a narrower condition — a specific category, say. Bricks applies the more specific template.
Next steps
The product page is one of six WooCommerce modules. The others cover cart, checkout, the My Account area, compare and swatches — see the WooCommerce feature page for the full element list, or the WooCommerce documentation for setup detail. Next in this series: building a custom checkout in Bricks and adding variation swatches.